Showing posts with label recipes. Show all posts

Tuesday, August 20, 2013

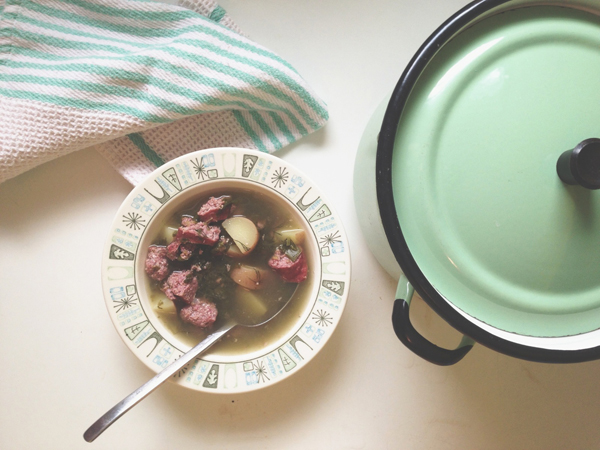
Zumma borscht recipe.

Alright, you might be thinking "What the heck language is she even speaking?" and most of you might not know this but I am a full blown Mennonite girl and I grew up in the country. Most of my grandparents' generation as well as my parents grew up speaking Low German (aka Plautdietsch) which unfortunately wasn't passed on to my siblings with the exception of a basic understanding of a few key words and phrases. Low German is probably one of the un-sexiest languages that exists, but I often catch myself using the odd word when nothing else will do! That said, Zumma borscht, also known as summa borscht or green borscht is a mennonite soup that is made to celebrate the start of the early Summer garden! With such things as fresh dill, baby potatoes and sorrel! Wait, what the heck is sorrel you ask? Well, as a 6 year old I grew up sitting at the end of my Kroeker grandparent's deck eating this leafy green thinking that I was so cool for eating what I thought was just a weed. Ha! It turns out I wasn't as cool as I thought, and it's actually a green used in lots of soups - like this one, and has a very bitter/sour taste to it.  Unfortunately if you don't have a garden full of the stuff, it can be tricky to get your hands on, but good news - you can use the greens of beet tops as a replacement! This soup is also often used with a ham bone to make the stock, but I much prefer the farmer sausage. Ps - there's absolutely nothing better than mennonite farmer sausage! 
All you need:
10 cups water
1 ring (2 sticks) of farmer sausage
1/2 cup chopped green onions

2 cups chopped fresh sorrel (or beet tops)

1/2 cup fresh dill

1 bag of red baby potatoes (peel kept on)

1 bay leaf
salt & pepper
sour cream/heavy cream (optional)
white vinegar (optional)

All you do:

-Add the farmer sausage to the water in a large soup pot and bring to a boil. Cook for about 1 hour: this makes your soup stock. 
-Next, remove the sausage and let cool and then chop it into bite-sized pieces.
-Now add the baby potatoes (chopped into bite size pieces) green onions, dill, sorrel, bay leaf and pepper. Cook until the potatoes are done.
-Now add the farmer sausage back to the pot.
-Finally add sour cream or heavy cream once soup cools a bit, or vinegar.

There are a few different ways that you can eat this soup. I grew up eating zumma borscht either plain or with a dash of white vinegar to give it a little zip. If you want it a little creamier you can add a bit of heavy cream and/or a dollop of sour cream on top. Make sure you don't add vinegar and cream/sour cream because it will curdle. 
Oh man I wish you could smell my kitchen right now! It brings me right back to my grandma's kitchen when I was a little girl.
I hope you like this menno soup!

XO, Erin

Wednesday, August 14, 2013

Garlic & Mushroom Baked Brie Wrapped in Puff Pastry.

I love brie. I love pastry. So this sounded like the perfect appetizer to me!
*Note: I changed a few ingredients from the original recipe because I wanted to use ingredients that I had on hand. This is a very adaptable recipe!*

MUSHROOM FILLING:
-1 Tbsp olive oil
-1 cup mushrooms, sliced
-1 cup onions, sliced
- 1 Tbsp roasted garlic, finely chopped
-1 Tbsp white wine
- Salt & pepper
BRIE EN CROUTE:
-2 tbsp flour
-1 puff pastry
-6-8 oz round brie cheese, rind trimmed off
-1 egg & 1 Tbsp water (makes the egg wash)

***

Preheat oven to 400F. Heat a small skillet to medium and add oil. Add the onions and mushrooms and season them with salt & pepper and cook until the mushrooms release their water and onions caramelize, then reduce the heat to low. Next add the garlic to the pan and brown for about 2-3 minutes (not too long because you don't want the garlic to burn!) Once the garlic is aromatic add the white wine and cook until all of the liquid has evaporated and then transfer to a bowl and set aside.

Next, lightly dust the counter with flour and unfold or roll out the puff pastry on the surface. Place the prepared mushroom mixture in the center of the pastry and then stack the brie on top of it. Fold the pastry over the cheese, trimming off the excess. Lightly coat the whole pastry with the egg wash and flip the wrapped brie so that the seam side is down. Bake on a baking sheet for about 25 minutes or until pastry is golden brown. Let stand for about 10 minutes before serving.

Serve with crackers and fresh fruit and enjoy as an appetizer at your next dinner party!

Wednesday, August 7, 2013

Skillet rhubarb cobbler.


I love rhubarb season so so much and recently swiped a bunch from my mom's garden. I came across this recipe and thought I needed to try it out. It turned out pretty darn perfect if I do say so myself!
Here's the recipe including the raspberries:
  • 3 cups fresh rhubarb, coarsely chopped
  • 1 cup of frozen raspberries
  • 3/4 cup brown sugar (light or dark)
  • 4 Tbsp. butter, melted and cooled slightly (divided)
  • 2 eggs, lightly beaten
  • 1/2 cup milk
  • 1 tsp. vanilla
  • 1 1/2 cups all-purpose flour
  • 2 tsp. baking powder
  • 1 cup granulated white sugar
  • 1 Tbsp. shortening, for greasing pan (could use butter or spray)
  • ***
Preheat oven to 375 degrees Fahrenheit, and put the rack in the centre of the oven.
Grease a cast-iron frying pan with shortening, butter or non-stick spray. Set aside.
Next, chop the rhubarb and wash along with the raspberries, then put it in a bowl and toss it with the brown sugar and set aside.
In another medium bow, combine 3 Tablespoons of the melted butter, the eggs, milk and vanilla. Stir to combine. Add the flour, baking powder and sugar.  Stir until batter is smooth and thick.
Pour the batter into the pan and spread evenly. Top with the fruit mixture, spreading it evenly over the batter. Drizzle the remaining 1 Tablespoon of melted butter on top. Bake for 45-50 minutes or until firm and golden brown. (My oven is on the fritz, and took well over an hour to bake, so just keep an eye on it.)
This is the kind of dessert that you have to eat while it's warm! You can top it with whipped cream, or ice cream. I decided to make a quick icing to drizzle over top using icing sugar, a tiny bit of milk and a drop or two of vanilla extract. This skillet tastes exactly like a cake that my mom makes and the raspberries were such a good addition to it. Happy baking! Let me know if you get the chance to try this, trust me you won't regret it!
XO, Erin

Thursday, July 18, 2013

Beer, bacon & cheddar mussels.


YOU WILL NEED:  (serves 2)
-1 lbs mussels, washed
-a can of your favorite beer
-2/3 cup whipping cream
-4 slices of bacon, chopped
-1 small onion, chopped
-3 garlic cloves, coarsely chopped
-1 jalapeno pepper, chopped 
-1 cup cherry tomatoes, quartered
-1/2 cup whipping cream
-1 1/2 cups cheddar cheese, grated

Note: you can use more or less jalapeno peppers depending on what level of spiciness you prefer. All of the vegetable amounts are approximate so feel free to use more or less as you please.


First start off by preparing the mussels by washing them, discarding any open or broken ones, and de-bearding them. (If you are unsure of how to do this properly, take a peek at this helpful video tutorial here.) Next, chop the bacon into pieces and cook it in a large stock pot or dutch oven, stirring occasionally until the bacon is nicely browned. Then drain the majority of the bacon fat and remove the bacon, placing it in a bowl to use later.

Return the pot to the heat and add the onion and garlic and saute until the onions start to caramelize and the garlic becomes aromatic. Then pour in the beer and add the bacon and chopped jalapenos. Also add a sprinkle of salt and pepper. Once the beer heats up and starts to lightly bubble then you can dump in the mussels and put a lid on the pot to let the mussels steam. They usually only take about 5-7 minutes to cook, but it is easy to tell when they are done because the shells open up. There are usually a few that don't open, so just discard those ones and don't eat them!


Finish the dish by tossing in the cherry tomatoes and adding the whipping cream. Slowly stir in the grated cheese until it just starts to melt. Scoop the mussels out into bowls and pour plenty of broth over top. Serve with toasted french bread to dip into the broth and a big empty bowl in the middle of the table to discard shells.


This is one of my all-time favorite meals so I hope you enjoy it too!
XO, Stef

recipe adapted from one that I found here.

Wednesday, July 10, 2013

Feelin' cheesy.

Alright, so by now I'm sure that it is no secret that I am a huge sucker for anything made with cheese. In my mind, if there is cheese in it, it's gonna be gooood. If there are any of you out there that feel the same way as I do then these delicious recipes will be right up your alley because they all have one fantastic thing in common: lots of cheesy goodness!

This recipe for ice cream made of frozen strawberries and marscarpone cheese is at the top of my must-try list for summer!

I haven't tried this yet, but I can already tell that it would be an instant favorite: Prosciutto, blue cheese, honeycomb and walnut salad. I mean, really.

I love making a rustic flatbread loaded with fresh toppings for a dinner party appetizer and this recipe for peach, basil, and ricotta flatbread looks nothing short of incredible!

One of my favorite things to experiment with in the kitchen is the mix of sweet and savory and this recipe for fontina cheese and blackberry basil smash sandwiches looks out of this world!

I have been meaning to try my hand at making homemade ravioli for awhile now and I think that I should start with this recipe for caprese ravioli with a roasted tomato pesto sauce! Mmm....


However, when in doubt, you can really never go wrong with a classic cheeseboard paired with some fresh fruit and crusty french bread. Does it really get any better than this?

XO

Wednesday, July 3, 2013

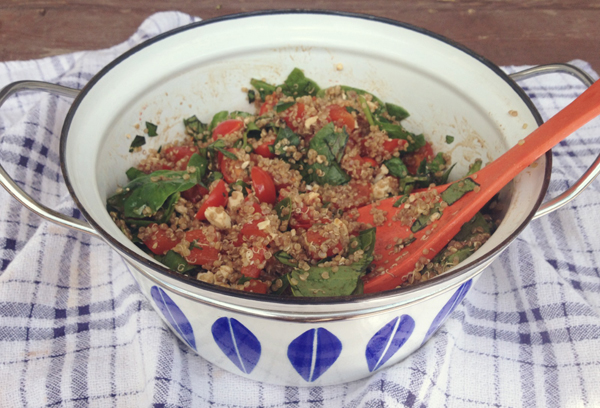
Caprese quinoa salad.

Like what seems to be the whole rest of the world, I've been eating a whole lot of quinoa lately. I was getting a little tired of  my go-to recipes, so I decided to create a new one! I threw some of my favorite ingredients and flavours together in one bowl to create my spin on a caprese quinoa salad!  I know caprese usually has mozzarella, but the feta cheese seemed to work a little better for this one.
What you'll need:
1 Cup of quinoa
1 red pepper roasted
1 Cup of cherry tomatoes 
1/2 C Feta cheese
1/3 C Fresh basil
2 big handfuls of fresh spinach
Balsamic Vinegar
Olive oil
Instructions:
First get your quinoa cooking, and while it's on the stove put cherry tomatoes on a baking sheet lined in tinfoil. Sprinkle with S&P and bake at 375 degrees for 5-10 min until nice and roasted. Next roast your red pepper by broiling in for a couple of minutes brushed in oil. Once skin is blackened, put in a bowl of cold water and let cool off. Then simply remove the peel. Chop the roasted red peppers into bite sized pieces. Now crumble up your feta cheese and chop up the fresh basil. Now all you have to do is combine everything in a nice big bowl, pour the balsamic vinegar and a tiny bit of olive oil and mix it all together! I like this served warm, but it's also really good cold!
Enjoy!
xo, Erin

Thursday, June 27, 2013

Cast iron recipes.

I recently bought a new cast iron pan, and i've been trying to find some good recipes to try out in it. I rounded up ones that I was pretty much drooling over and thought those would be a good start! Do you have a favorite cast iron pan recipe? We'd love to hear it!


I know I posted this once before, but this roasted red pepper and feta skillet scone looks too good not to try! Recipe found at Joy The Baker.

Oh my goooooooodness, these Irish nachos literally have me wanting to lick my screen!

This golden beet & blue cheese risotto looks so creamy and delicious!

Breakfast Potatoes with Parsley, Crème Fraîche, & Sriracha? Sign a girl up!

I've made this recipe for green curry turkey meatballs before, and it's on high rotation in my home!

I knew when I saw this recipe for lime chicken and corn pizza over at Design Love Fest, that I would be making it immediately! Doesn't it look so delicious?

A good ol' traditional breakfast in a pan!

Tuesday, June 18, 2013

Homemade jalapeno poppers.

This recipe is always a hit when I make it for an appetizer at dinner parties, especially in the summertime when I can use my BBQ! It is so simple but so very flavorful! Another great bonus is that this dish can be prepared ahead of time and refrigerated until your guests arrive and you're ready to throw the peppers on the grill. Also, this recipe is super quick and easy peasy!

All you need is a bunch of jalapeno peppers that are all similar in size, cream cheese, and a pack of thick bacon. That's it! First off, start off by cutting the peppers in half lengthwise so that each pepper makes 2 poppers. Next, using a spoon carefully scoop out the seeds inside the pepper and discard them. After that, use a butter knife to spread the cream cheese into the hollowed out jalapeno halves. Then wrap a strip of bacon around each pepper twice and cut off any excess and secure through the middle with a toothpick.

Preheat your BBQ to a medium-low heat. Keep it mind that every BBQ is different so just be sure that you don't set your temperature too high because you don't want the bacon fat to burn before it's cooked fully through! Leave the toothpicks in and grill the peppers for about 4-5 minutes per side or until bacon is nicely browned. Let cool for a few minutes before serving because these guys are extra hot!

These will make the perfect side dish for your next Mexican feast or at your next summer BBQ! Enjoy!

XO, Stef

Wednesday, June 5, 2013

Summer salad recipe.

I don't know about you guys, but I have been a tad obsessed with mangoes this Spring. I've been adding them to just about everything I can think of, from guacamole to this-my new favorite salad! It's super easy to make, it's fresh and healthy, so for those of you who never know what kind of salad to bring to the next bbq, look no further!

Recipe:
1 box of arugula
1 ripe mango
Dried cranberries (couple of Tbsp)
Feta cheese (couple of Tbsp)
Slivered almonds, toasted

Dressing:
1 orange, juiced with a tiny bit of zest as well
2 Tbsp rice wine vinegar
2 Tbsp olive oil
1 Tbsp fresh ginger
Red chili flakes

First thing you do is toast your almonds, just pop them in the oven and bake for a couple of minutes, but keep an eye on them because you don't want to burn them! 
Next toss the arugula in a bowl and add a diced mango, followed by the feta, cranberries and almonds.
Whisk together your dressing ingredients and pour over the salad. See? Easy peasy!
Enjoy! (note - there is a bunch of feta hiding in there, we promise!) 

Thursday, May 16, 2013

Roasted cauliflower & corn tacos.

Lately I've been on a bit of a roasting cauliflower kick, and after playing around with it a few recipes for a bit, I think I finally figured out the perfect combination! It really is the perfect recipe for Summer, it's easy, healthy and so fresh and tasty! I haven't tried it yet, but I think this would be amazing to do on the BBQ!

All you need:
Small head of cauliflower
2 ears of corn on the cob
Olive oil
Chilli powder, red chili flakes, cumin, garlic powder, salt & pepper
Taco shells.

All you do is slice the cauliflower and cut off the corn, throw it on a baking sheet, drizzle with olive oil  (just a bit) and then sprinkle with the spices. Bake at 425 for 20 minutes. For a little extra flavour I squeeze a lime over it once it's baked.

My current obsession is this avocado spread I created kind of by accident one day. It turned out amazing and i've been putting it on burgers, fish tacos and now these bad boys ever since!
It's super simple. You will need a food processor of some sort. I use this and I love it and highly recommend it! 

You will need:
1 large avocado or 2 small ones
1 jalapeno
3 green onions (scallions)
juice of 2 limes, 
1/4 C light mayo
1/4 C cilantro (optional)

Throw this all in your food process and pulse until it is puréed.

Now simply assemble your tacos! I like to add hot sauce, extra cilantro and a little more lime juice. Some other good options that I have tried are feta cheese and greek yogurt. 
Enjoy!

xo, Erin


Monday, May 6, 2013

Sour cream coffee cake recipe.

Ok let's get one thing straight. I don't care for sour cream and I don't drink coffee, (funny but there isn't any in this recipe!) but this bundt cake is one of my favorites! My mom has been making this coffee cake for as long as I can remember. Early some Sunday mornings, I would smell the cinnamon/sugar from my bedroom in the basement and would come running. 

Here's what you will need:
1/2 C butter or margarine
1 C sugar
2 eggs
1 C sour cream 
2 C flour
1 tsp baking powder
1 tsp baking soda
1/4 tsp salt
1 tsp vanilla extract

Topping:
1/4 C sugar
1 tsp cinnamon
1/2 C nuts (optional)

Instructions:
First cream the butter and sugar. Next add well beaten eggs. Now mix and sift the dry ingredients and add alternately with the sour cream. Lastly add the vanilla extract. Now pour half of the batter into a greased bundt pan (don't forget to grease the middle part like I did!) then sprinkle half of the topping mixture. Add the remaining batter and sprinkle the rest of the topping mixture on it. The batter will only fill up about half of the bundt pan, but don't worry, it will rise! Now pop it in the oven and bake at 350 degrees for 40-50 minutes. Test it with a knife after 40 minutes and if it comes out clean, it's done. As soon as it is finished turn it upside down onto a plate. 
You have to eat it when it's hot though, and it's best served with a little bit of butter and a slice of cheddar cheese on the side, and don't forget a cup of coffee (or tea in my case). Enjoy!

xo,
Erin

Monday, April 15, 2013

Carrot & ginger soup recipe.

This is one of Emery's and my favorite soup recipes. It's quick and easy to make and also very healthy (which makes it even better!) We have already whipped up numerous batches this season, so I figured I should share it with you guys so you can enjoy it too!

YOU WILL NEED:
1 tablespoon olive oil
1 onion, chopped
6 large carrots, peeled and chopped
2 teaspoons ginger, chopped
1 tablespoon dried basil
1 vegetable stock cube
3 cups boiling water
1 teaspoon freshly ground black pepper
1 teaspoon sea salt
1 teaspoon sour cream or greek yogurt
chopped fresh basil for garnish

***
Heat olive oil in a large sauce pan or dutch oven. Add onion, carrots, and ginger and cook for about 5 minutes so that they begin to soften.

Mix up vegetable stock using the boiling water and stock cube. Add to sauce pan along with salt, pepper, and dried basil and bring to a boil. Cover and let simmer for 35 minutes or so. (you want the carrots to be nice and tender!)

Pour contents into food processor and blend. You may wish to add more water to thin out the soup a bit.

Pour into bowls and garnish with chopped fresh basil and a scoop of sour cream or greek yogurt and serve with a side of warm bread for dipping.

***

Enjoy! XO, Stef

Wednesday, April 10, 2013

Recipe for Laab Moo - A spicy Thai pork salad.

Well friends, I hate to rub it in, but since we are living it up in Thailand and getting to eat our favorite Thai dishes, I thought I would share one of my Thai staples when I'm back at home. Laab Moo - it sounds funny, but trust me, it is delicious. It's super easy to make and it's really healthy to boot! Laab also goes by the name of Larp or Larb, but I've always known it as laab. It is a popular dish from Northern Thailand as well as Laos and is a sour, spicy and refreshing meat salad. I chose to use pork, but chicken, turkey or beef also work. 
Ingredients:
1 package of ground pork
1Tbsp of red chili flakes
1 Tbsp of peanut oil
1 Tbsp of crushed garlic
Red Thai chillies

Sauce:
Juice of 2 limes
3 Tbsp fish sauce
1/2 Tbsp sugar

Herbs/Greens:
1 whole long english cucumber cut in quarters
1/2 red onion, thinly sliced
1 C. of chopped cilantro
Handful of fresh chopped basil
3 Tbsp fresh chopped mint
1 head of leaf lettuce (optional)
Handful of chopped cashews or peanuts

Instructions:
* First fry up the meat with the oil, garlic, chillies and chili flakes. Cook until the meat is no longer pink. *
* Next add all remaining ingredients and mix together well. *
* Let mixture stand for 20 minutes and then serve. *

Red Thai chillies really pack a punch, so if you don't like it too spicy, start with just one or two. My husband and I love it really spicy!

Now all you do is grab some chopsticks and serve as lettuce wraps with crisp leaf lettuce cashews on top for a bit of crunch. Or just eat it straight out of the bowl! 

I hope you like it!
XO Erin

Tuesday, April 2, 2013

Crab Wonton Recipe.

Since we're off to Thailand tomorrow (YAY!) I thought it would be appropriate to share my all time favorite Thai appetizer - crab wontons, also known as crab rangoon. This is one of the easiest, cheapest and most delicious recipes I've come across.

Here is what you need:
1 package of Crab meat (I used imitation crab meat)
Half of a brick of cream cheese at room temperature
1 pack of wonton wrappers. (I had a bunch in my freezer so I made small ones and medium sized ones.)
1/3 C chopped green onions
1 heaping Tbsp og chopped ginger (ginger is really great to freeze too!)
1/2 tsp garlic salt
S&P
1 egg (for sealing the wontons)

* This recipe makes approximately 12 medium sized wontons and 14 small ones. *
Go ahead and freeze your extra wonton wrappers and save them for your next batch.

All you do is chop up the crab, and add the chopped green onions, ginger, the cream cheese, and the garlic salt. Mix it all together really well, season with salt and pepper and you're ready to start assembling the wontons!

Now to fold them up. It's really quite simple. First you brush the edges with your egg in the shape of a square. Scoop the mixture into the middle, then bring two of the opposite corners up together and pinch together. Finally repeat with the opposite corners and give it an extra pinch right in the middle to make sure it's sealed up nicely. Now all you do is fry them up! I heated up oil in my frying pan and dropped them in carefully, cooking up 4 or 5 at a time and frying them until they were golden. 
If you don't plan on eating them right away (yah good luck with that) you can put them on a baking sheet and pop them in the oven for a few minutes to heat them up again.
Even though my house will smell like deep fry for a few days, these bad boys are so worth it! 
They are best served with peanut sauce or a Thai chili sauce.
Happy wonton-making!

Enjoy!
XO, Erin